Posts

Showing posts from February, 2024

It has begun!

Last week I tried to continue on with Night Wish and I started strong on Monday with progress, but then I didn't stitch for the rest of the week. Let's get the progress out of the way, and then I'll explain. I left off here last time:

NightWish058

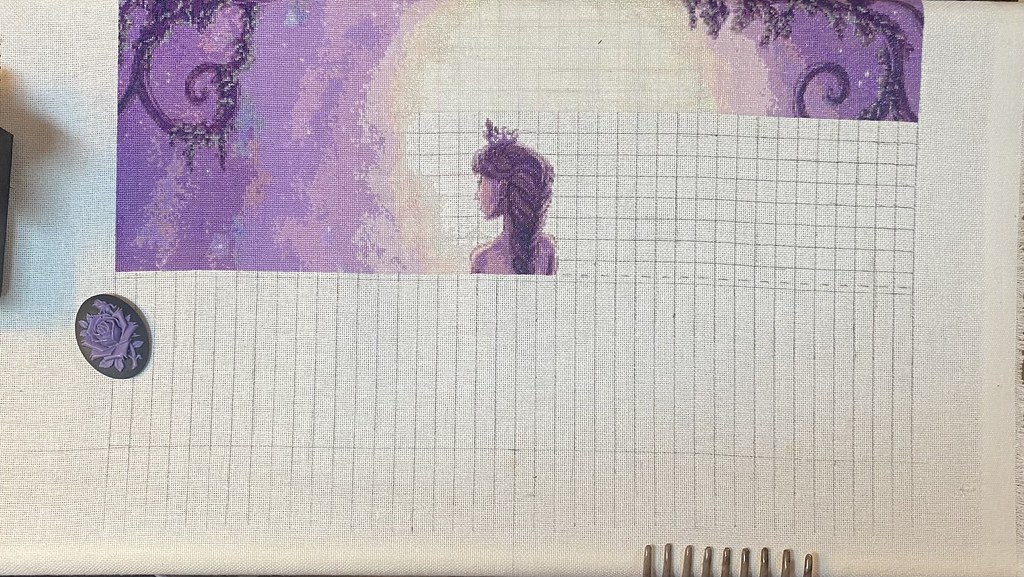
Even though it doesn't look like much, it was all the Petit Treasure Braid on this one side, as well as the rest of the final touches around her face. It was definitely a lot of work for one night, even if it doesn't look it:

NightWish059

I don't really even have a good excuse. Although I finished watching Castle and it was OK (I can at least say I've seen it), I was not oblivious to the number of Firefly references throughout that show, it became like my Hidden Mickey game in Once Upon A Time. But it also meant that it put in me in a Firefly mood, and Firefly, well, let's just say that Firefly is one of my obsession shows that takes over for quite some time and it's a hard pit to dig myself out of once I'm in it. Like any other of these obsession fits of mine, I will just have to let it run its course, but it may be a long one, so I've just accepted it and am dealing the best I can. Hey, it could be worse, it could be Twilight, right? I might not want to give myself any ideas, so I'm going to change the subject now.

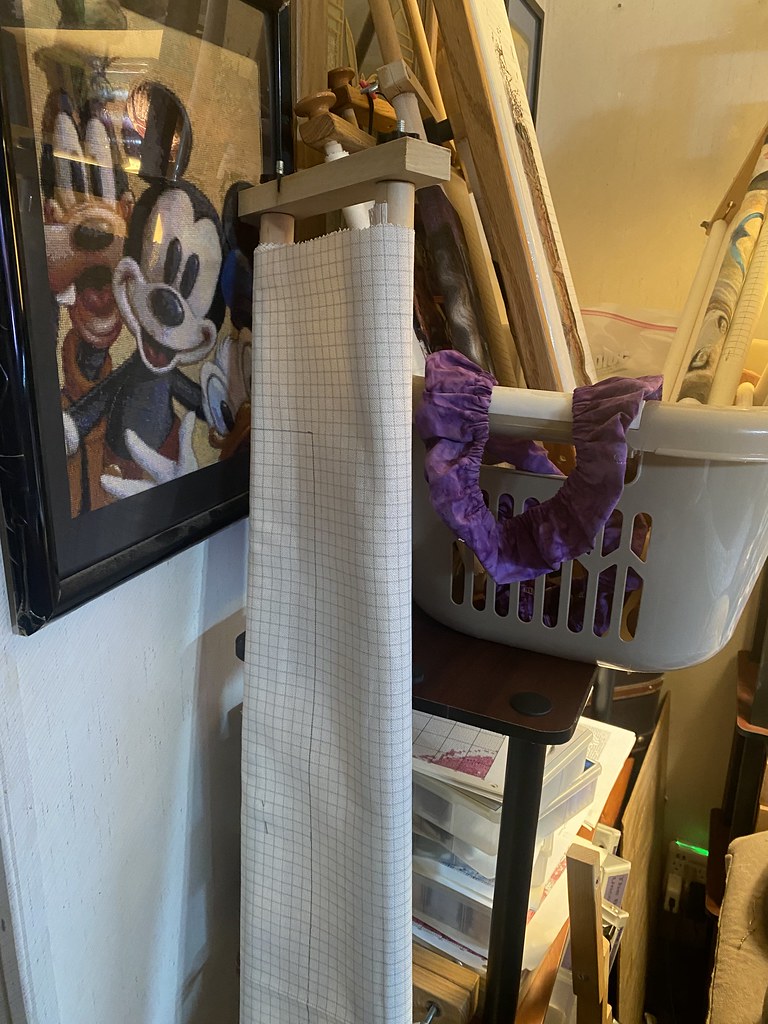
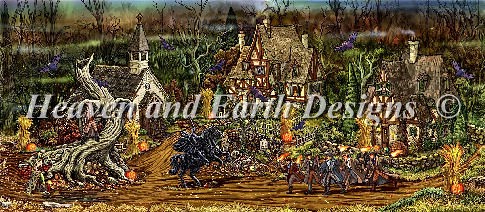
By Friday, I was able to scroll rod up the fabric for the new projects (at least some of them, still waiting on some supplies to come in), and by Saturday morning, I started my first project! I went for the US version of the Harry Potter Bookcovers (in case you don't remember, it looks like this:

HP-USBC_000a

So I started with a blank slate (and more on the fabric and the gridding on the gridded fabric in a minute):

HP-USBC_001

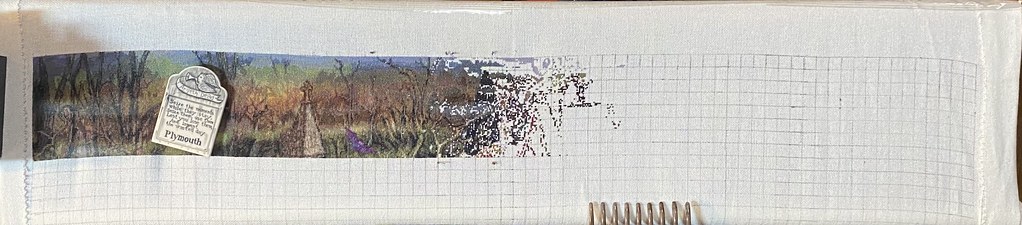
I had a little trouble focusing on Saturday, because I had to catch up on some of my YouTube stuff, I'm more than a bit behind on all the channels I watch (and I was still going back and forth between that and Firefly, god help me when I start watching reactors reacting to Firefly), so I only stitched about 6 hours (not great for a weekend):

HP-USBC_002

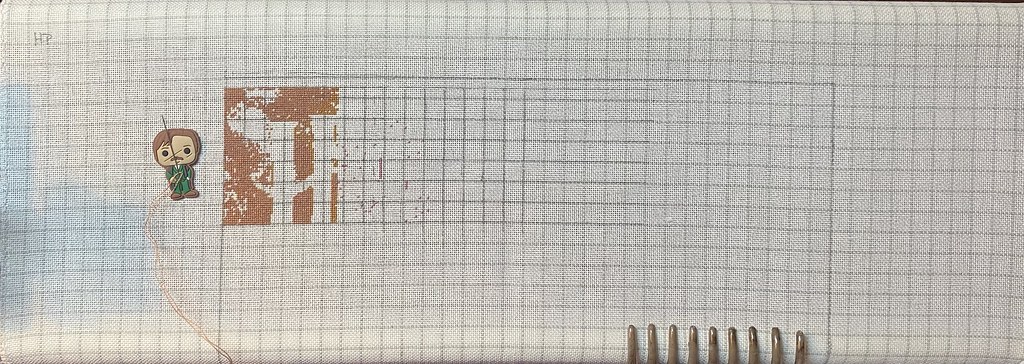
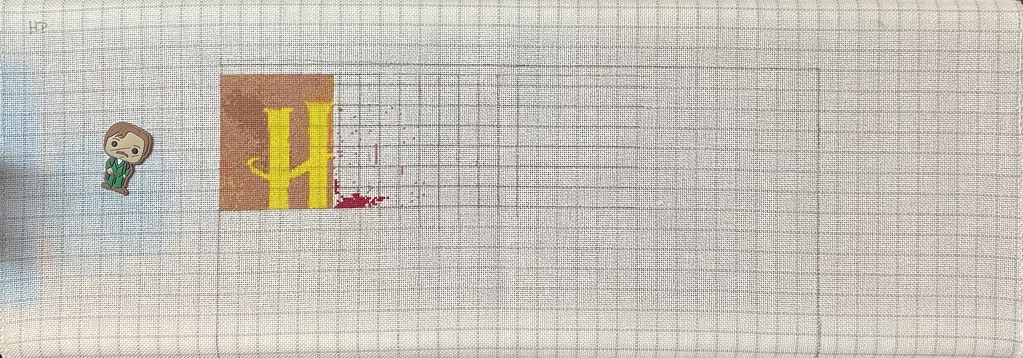
but I got in a good solid 8 hours of stitching on Sunday, so I almost finished the first page (but that's not saying much and I'll explain more on that, again, in a minute):

HP-USBC_003

First up, the magic guide fabric. You will notice that I did add grid lines myself. Until I get used to the magic guide, I thought it was for the best. Up close, the magic guide covers a row of stitches and, as long as you plan it out, you can work out in your brain where to start and where your block is, but until my brain figures that out on it's own, I needed a bit of help.

Magic guide

It's way easier than griding yourself beccause there was no counting involved and now I feel a bit spoiled (I spent several hours Friday night griding up the first row of both Evil Queen and Merida because they were on non-grided fabric, so I had to count it out and count it twice, the joys of OCD). If the fabric itself works out nice, I can see myself using this for all future projects! I decided to go with top and far left for my grids on this, and it's working out well. I initially only gridded the first page of HP, but I went ahead and moved into the second because it's pretty easy and I'm not ready to do it myself yet.

Untitled

The other snag is the pattern itself. I don't know about most people, but I tend to stitch like I read, left to right, top to bottom. There are some notable exceptions, but as a general rule, that works best for me. This pattern, the top row of pages is technically the last row of pages. Here is the page chart map:

HP-USBC_000b

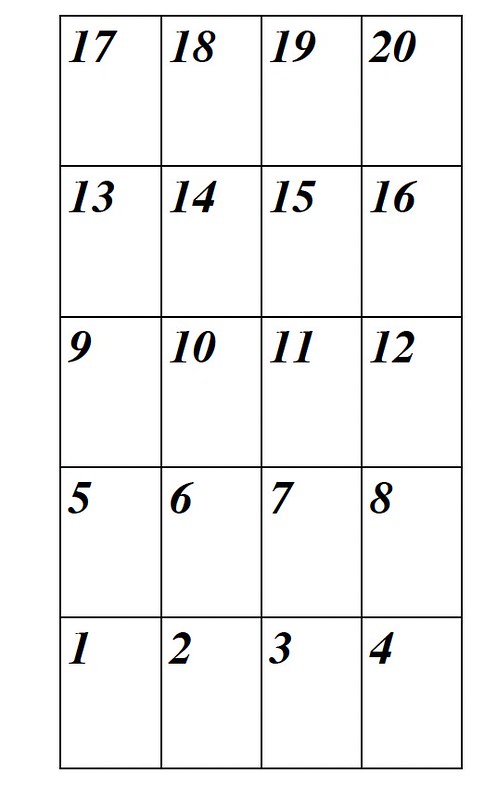
So even though it looks like I'm breezing through the first row, it's not even a full row because it's the partial bottom row. It's SUPER weird. And, of all my new WIPs, it's not the only one to be arranged in a non-standardized (left to right, top to bottom) pattern arrangement. There are more than a couple, each with a different arrangement. I don't get the logic in it, and I'm not a fan, but oh well, it is what it is.

I wanted to start all these new WIPs in the month of February for Leap Year, but I don't think that's going to be possible since it's already almost the end of the month, unless I start switching them daily. I'm really enjoying Harry Potter, and I want to keep working on it for now. To be honest, I thought this one was going to be WAY more difficult than it is. When I first saw this, it was somewhere on a Reddit post (I don't have a Reddit account, but it was just something I came across while looking for HP patterns) and I remember the poster saying it was the hardest pattern she had ever done and had taken her years, even though she was an experienced stitcher. I'm pretty sure I got the same version as her, the super-sized version, and I used her post to find the pattern in the first place from Fox and Teacup Designs. I know I'm using a smaller fabric ct (I'm using 28ct and I think she was using like 12 or 14ct), but that's the only difference I know of, and that usually doesn't make something more difficult if it's what you're used to (12 or 14 would make it more difficult for me, but for someone else, 28ct might be harder). If I focused steadily on this, I think I could finish it in a couple of months (but obviously I'm not going to do that) and the chart is VERY easy to follow. I'm a bit confused now on what the difficulty was. I'm starting to wonder if I got the wrong pattern or something. Oh well, again, I'm not going to complain about it. It was an older Reddit post and since I don't have an account, I could only follow the string so far down before it blocked me anyway.

The other issue, one you can't see, is that in the actual pattern I printed off, J.K. Rowling's name is at the bottom of the books and looks like this (not the image you see above):

HP-USBC_000c

I got two patterns when I bought it and I didn't understand that one of them had her name at the bottom and one didn't (although the "unnamed" version should have been my first clue...I just figured it out when typing up this post, I can be pretty thick sometimes). I just printed one at random (which happened to be the one with her name). I've been trying to figure out how to stitch her name out this entire time and whether or not I should. Now, considering it's just one row of pages, it's an easy fix because I just need to print off that row instead of a whole new pattern. Easy fix or not, it's still a question of "should I?" because, despite the obvious reasons of her personal views (which I do NOT agree with), she is still the author of the books and these are her bookcovers, US versions or not and I like true representations of things. Like a lot of HP fans, I've chosen to give up on her and not the franchise, but I think this is kind of a special case. I'm not sure I feel comfortable with her name at the bottom of my project to be honest, true representation or not. So I'm at a weird cross roads. At least I have a choice now, so I think I might print the extra row and make the decision when I get there. Maybe things could change by then.

Next week will see if I've moved on to another or if I'm still in Harry Potter world (although technically, I do have two new HP projects in my new WIPs, so we'll see), so have a good week everyone and aim to misbehave!

Best laid plans...

I barely stitched this week. Partly, because I wasn't in the mood, and partly because I was working on building my new scroll rods, a process I did NOT enjoy. I didn't plan the process out very well. I got the right amount of dowels (which was more of a case of not knowing which circumference to get, so I got a lot to try), but I didn't get enough of the side 1x2 boards (I only bought two), which ended up making five sets (not nearly enough for the number of dowel sets I had, but I also kept changing their length, hence the abnormal number), and the hanger bolts recommended in the video seemed really big to me, especially compared to the bolts in the scroll rods I usually buy that are built similarly (those are way smaller in diameter), but I don't know enough about measurements to figure out how to get a smaller size. She mentioned in the video that sometimes they split. I can see why (and I almost split one). I also didn't even come close to getting enough hanger bolts because I didn't account that I'd need two packs (there were two per pack) for each scroll rod frame (two for each dowel, two dowels per scroll rod frame). That meant that I also didn't have enough twisty knobs for the sides...it was an overall mess.

By Saturday, I had already built another Lowe's cart that was reaching up to the $100 mark for more supplies to finish the other rods. But then, I decided I needed to do a test first before I spent anymore money, so I took the scroll frame I made for Bookshelf, since it was the biggest, (only one of three that I had actually finished), put the fabric on it, and got the shock of my life...it wouldn't stay stable! The knobs wouldn't tighten, they just kept spinning (which washers might fix, but that meant yet another purchase that may, or may not, work), the fabric was super loose, and it was a wobbly mess! To say my frustration level was on high, is an understatement. I still don't know how the lady in the video made hers work, but here's mine. I took a picture of it on Sunday night after I calmed down a bit (and it's only part of it, the whole thing is 4' tall and I didn't feel like framing a photo properly by this point):

Untitled

Sleepy Hollow Mural is also long, but its frame is store bought has a stablizer bar at the top which keeps it from being wobbly (which it is without that stablizer bar, a fact I had actually forgotten). I do typically prefer the bought scroll rods that are built with bolts in the ends with knobs to tighten them to the side bars. I don't like the split rail things, although I do have some of those too. The bolted kind are a bit more expensive, but not like those Millennium frames or Omanik or any of those other fancy things that cost more than my entire stand (which is the most expensive cross stitch thing I have ever bought). Here it is, the extra bar screwed at the top (and a split rail behind it):

Untitled

So I added more things to the Lowe's cart to built a stablizer bar for the longer projects, more hanger bolts, washers, more knobs and nuts, more 1x2's for more side bars, and then I realized that I basically almost had the same amount it would cost me for "real" scroll rods for all but the big two projects and I could just use my much dreaded Q-snaps for the two biggies. It's not ideal, but why spend more money to build more stuff (which I hated the entire process of) and there was still a chance it didn't work and I would end up buying the scroll rods anyway. It was the lesser of two evils and I had really had enough by that point. Like I've said, a woodworker I am NOT. So, off to Amazon I went, and bought everything I needed. Yes, I did spend more, but it was well worth it for the lack of trouble.

It's not better than those super-expensive frames that are strong enough to be 48" long and hold everything taunt, but it will do. Now, here comes another rant...when it comes to cross stitch accoutrements, needle minders are a big yes (I kind of think of them like Disney pins, collectible, but usually not that expensive, so it's something I can justify, especially since I can make them myself), but all the other stuff...expensive stands, francy frames, scissor fobs, and especially fancy project bags, nothing but decorator swag and all I can do without. If someone can sew and make their own project bags, then cool, but I can't sew. I'm a bobbin person, so I keep each project in their own bobbin box. I use paper patterns (along with apps), so bobbin boxes and paper also aren't that conducive to project bags. I also don't stitch on the go, or have a craft room to store everything in. I keep all my WIPs on a bookshelf behind my chair (a piece of which you can see above). The scroll-rodded projects in a clothes hamper on top, the bobbin boxes with the row of sheets I'm working on stack neatly on the next shelf, the shelf below that is the three-ringed bingers that hold each printed project in their entirety lined up (or, for the smaller ones, the zip plastic envelopes), and the bottom shelf is old lapstands (probably, soon to be the new WIPs). It's all tight and confined, but definitely no room for another container for project bags.

And just to add to that, same with those new chip system thread keepers, both the hanger kinds and the bobbin kinds...a whole set of those is about $250...I mean, seriously? I can buy 500 bobbins and five thread box for under $20 (and Michael's thread boxes come with 100 bobbins in each box, so that's 1000 bobbins). Then, you have to buy these foam inserts for those chip things to go into either an Ikea or another storage system (both of which ain't cheap either)...I live in a trailer. I ain't that rich and I don't have the room. I think, even if I won the lottery, I wouldn't own those things. It's a waste of space having the bobbins spread out like that like rings in a ring box. But to each his own, I guess and if you have the money, I guess you can spend it on whatever you want.

I also think my issue with project bags is tied to my OCD...I like bobbin boxes because I have the entire project's thread in one area, all together, neat and clean. The thought of throwing a few bobbins in a bag separate from the set drives me insane. I wouldn't be able to do it. Plus, I just don't work that way. I won't know which direction I'm working in until I get there, and if I don't have the next color, I would go into panic mode. It's why I carry a 400lb purse around. I carry it all because you never know when you need it all. Irrational? Maybe. But it's how I'm built.

Now, having said all that, I did buy those cheap Amazon project bags so I have something to keep the larger Q-snap projects in. Hopefully, I don't end up with the issues I had with Sleepy Hollow because I left it in the Q-snaps all the time. I'm only going to be using them for Blue Marble and Bookshelf and neither one of their bobbin boxes is going to fit in the project bag since they are supersize bobbin boxes, but it is what it is. It's really just to keep the fabric safe. I also expect that the process of putting the projects in and out of the snaps is going to make me dread working on them. We'll see. I only have one grime guard (it's the purple thing hanging off my hamper above and yet another one of those luxury stitching items I don't see having dozens of), and I don't intend on buying another one, so it will have to be shared between the two.

Enough ranting, let me show you what little stitching I've done...oh yeah, but first, here is the coverage of 28ct Lugana that I meant to show you earlier...it's good coverage, but you can still see material underneath. Thanks again to Leonore and Sleepy Hollow for making me feel better about not switching Bookshelf to 25ct. Plus, after putting the 28ct Lugana magic count on the scroll rods to test it, it's awfully thin, so now I'm worried about it because this Lugana is way thicker. But here's Sleepy Hollow's coverage:

Hollow034b

Here is where I left off last time:

Hollow033

And I may regret it, but I stopped taking pictures all the way across, just to where I am, so that way the picture isn't so long and maybe you could see it a bit better, but it's still only two days of stitching since last time, so not much progress:

Hollow035

In the middle of Sunday, I also decided I was ready to move on from Sleepy Hollow, since I couldn't start one of the new ones (which was the plan and why I started building the new frames...I'm getting heated just writing this), so I went back to Night Wish since I barely got to work on her last time because of lapstand issues. I left off on her here back in November:

NightWish057

And again, since this was barely a third of a day stitching, not much progress, plus, as irony would have it, I ended up back in the Petit Treasure Braid! I mean, seriously?

NightWish058

For some reason, everything I ordered from Amazon is not going to be here until next week some time, so I'll be lucky to get every new project started by the end of the month. I can probably start on Bookshelf and Blue Marble, since I have the Q-Snap now, but as it stands, the very thought of Q-Snaps makes me cringe. I would rather wait and start the others first. HUGE props to everyone who uses Q-Snaps and loves them!

I can say though, one good thing did come out of this whole disaster...the side bars I made for my scroll frames can be used with the dowels from my bought ones. For some reason, I have a TON of the dowels, but not enough sides. Now, that issue is fixed. And wingnuts (which I also bought some of because I didn't know which I would want, the knobs or nuts), will work just fine with the store bought dowels. I'm not sure about the knobs yet, but I kept them just in case. I haven't thrown anything else out yet (because I'm a pack-rat), but I probably should. I doubt I will have use for those dowel rods anymore, especially the ones with hanger bolts hanging out the ends.

Not much luck on the stitching front

Turning Hook upside down actually worked pretty well...eventually. I learned (almost the hard way) that the direction in which you stitch is the same upside down. I made it across an entire row before I started to panic and question whether I needed to frog it all. My bottom stitches go ///// and my tops go \\\\\ (and I'm not too picky about which I go in first, top holes or bottom holes), but turns out, even upside down, they end up in the same direction! But what I did discover about three rows in was that I was one column short, and it was causing complications since I was working left to right (like I always do), but it's technically right to left upside down, so I was going from the far right edge to the area I had already worked, and I was meeting an area I was already up to and coming up short. It took me the three rows to figure it out. If I would have continued right side up, I'm not sure I would have figured it out if that final column stayed white all the way down. It was all pretty tedious work and I had trouble stitching last week because of a headache anyway, so I only went from here:

Hook-016

to here (with the extra column added) and I marked the page breaks to make it easier for me to figure out where to stop:

Hook-018

I can continue the white upside down, but I can't stitch the entire thing that way, it's too hard for me to figure out symbols, which was what I was afraid of. My brain doesn't work that way. And I had decided I'd better switch projects again because I was losing interest, so the only real project left in my WIPs (at least now) is HAED's Sleepy Hollow Mural by Lewis T. Johnson. I believe it's a retired pattern (which I guess means I have two retired HAED's in my WIPs). In case you don't remember it:

Sleepy Hollow Mural

It was the first project I ever tried on Q-Snaps since it was so long, but I had a horrible time with them, so I put them on the longest scroll rods I had (the fabric is still folded at both ends because the rods aren't long enough...if I have enough dowels left, I may make a new set for this one too). I left off here back in May of 2020:

Hollow031

And again, it was a headache week, so I only managed two measly stitch days on it, although I did spend one night alone just reattaching it to the scroll rods because it was another one that had come loose (plus, I tried to straighten it up a bit, it is stretched crooked because of the Q-Snaps, so it's taped to the rods in a really weird way). It' also Lugana, so that may have been why the fabric couldn't hold up well against the Q-Snaps. I also replaced my Mad For Minders Sleepy Stitch needle minder for one I made myself from a magnet I got from Plymouth, Mass:

Hollow033

Two things about this one have been an eye-opener. I know it's Lugana and even though it's 28ct, I can see the fabric through the thread, so it squashes the idea of 25ct for good. I thought I had already killed the idea thanks to you guys (especially Leonore, thanks girl!), but it must have still had a breath or two left because I was finally able to nail the coffin lid closed. 25ct Lugana is NOT for me, it's official. If I can see the fabric on this, then 25ct would be even worse!

Secondly, it's not nearly as long as my new Bookshelf will be, but it is really horizontal, and I can already see that long horizontal projects are going to be a problem in this new K's Creation Stand. It won't hold it well. I already have a concrete block holding down the base, but I had to add one of the buckets of water that I got when our water was off on top of the block because it was still tipping over (all three water buckets were still sitting in my foyer). Even tightened, the entire arm still gives way under the weight of it when I turn it away, so it probably means I won't be able to keep the project in the stand when I'm not stitching on it. That's a pity. I'm a bit scared the weld is going to give if I keep it on it long-term. Once I get some bills paid down, I may just have to spring for a Lowery stand or maybe even an Omanik (just the thought makes me cringe!). Stitching is definitely a rich person's game!

Speaking of which, I had every intention of building my new scroll frames this weekend. I didn't. I watched TV and worked on my family tree. I definitely am a cyclic person when it comes to hobbies I think, but the frustration with the stand was keeping me away from it this weekend. Oh, and in case you're wondering how I'm going to build these scroll frames, this is the video I'm getting my inspiration from:

I think I'm worried about the supplies. I bought what she recommended, but I think the hanger bolts are too big for the dowels, which means, if I replace them with a smaller size (and I'm not savy enough to know which way to go in bolt size to go smaller), then I also have to replace the knobs, so more purchases and more waiting for orders to come in. And, I'm not sure why I'm so scared of dealing with the drill. Granted, I don't have a fancy battery drill, it's an old plug-in kind, but it's not like I haven't built a ton of furniture in my day. I'm not a delicate flower, but it has been YEARS since I've even touched that drill...part of me is scared I'll put it out and it won't work and I'll have to buy one of those too! I'm more of a screwdriver kind of girl, but this project definitely calls for a drill. I think I've worked it up in my head to be more than it is, but I'm still watching long scroll frames on Amazon and part of me wonders if I wouldn't rather spend the money to buy one rather than deal with the stress of building one...money versus stress or the stress that spending the money will cause? It's a never-ending cycle.