April A to Z Challenge: Prep Work

Stitching is one of the most relaxing hobbies out there and there are numerous studies to show that various kinds of needlework can improve your health both emotionally and physically. For me, it's my "zone out time" where I can ignore my problems for the three or four hours a night, and do nothing but focus on the repetitiveness of it all (great for an Asper with OCD who obsesses about everything).
There is quite an expense required to stitch though (not the best thing for a poor person like me)...threads, fabric, scroll rods or frames (whichever you prefer), and then the little things like needles (which I break constantly), scissors, etc. For a large project, the thread alone might cost upwards of $100. For both of these projects, thread costs came to about $40. There are several colors of Light Effects thread, and those cost quite a bit more (and are a pain to work with, but I'll save that for a rant day). Oh, and don't even get me started on the cost of framing a project, it's why I typically frame things myself (if the shape permits).
Everyone who stitches uses different tools and goes about it in different ways, even if the end result is usually always the same. Granted, my "issues" tend to lead me down a path of overkill, but that's just typical me. Most stitchers probably don't go through all this prep work. But I do love organization and this is the best way for me to achieve my process of what I call "kitting up".
The beginning stages of kitting up means shopping. Normally, I have a bit of stock on hand (OK, quite a bit), but it's not always the best for the project I'm working on. If I don't have enough of the same color in stock at home, then I will re-buy them so that the color dyes come from the same lots. More than once I've had issues with thread not matching for one reason or another (even if it's the same brand).
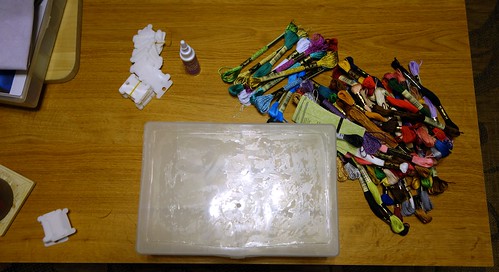
Once I have all the supplies, I print the pattern on Cover Copy Paper (which I find is easy to mark on and is sturdy enough to withstand daily handling). I also use this paper to print a cover for my bobbin box (more on that in a minute) and, depending on the pattern size, I will also create a three-ring binder (which means printing a cover and a side piece) to store the pattern. Luckily, neither of these projects are big enough to require a binder and binders are really only good for those long term projects, so that was a step I could skip. I also print a chart map and glue it to the inside of the bobbin box. Below are the purchased threads, a pack of needles, a bobbin box (obviously used), and some empty bobbins:
I do put the threads in numerical order so it's easier to put them in the box in the right sequence (most pattern legends are in numerical order anyway). Order also makes it easier to find a thread quickly when you're working. Here is my process of ordering the threads and prepping for bobbin winding. Sorry, I've whited out the box cover for these projects and the patterns to maintain the aura of secrecy, but you can see the cover for another project I was boxing up at the same time in the upper right-hand corner (I wish I would have paid more attention when I was taking photos and kept the patterns out of it...c'est la vie):
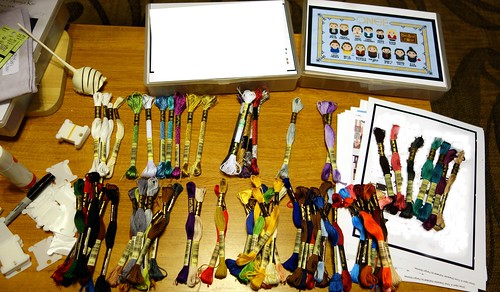
I write the floss number on the end of the bobbin with a Sharpie (I have those little stickers you can buy, but they always peel off, so I don't use them much and, when the project is finished, I just use rubbing alcohol to remove what I've written and reuse the bobbins). Even for a small project, the winding of the bobbins takes several hours (and several days in the case of a big one). On smaller projects, I do tend to put more than one set is a single box. The boxes are very cheap, so money isn't the issue here, it's just simply to save space. Here is what the box looks like when complete (the one on the right is the inside of the other Once chart I kitted up). Most people tend to turn the bobbins on their side in the box, but I like the numbers visible on top.

The next step is to prep the fabric. I don't typically wash my fabric before hand, but I have been known to steam iron it if it's wrinkled. I went with 18ct Aida for these projects because, on "simpler" designs, I prefer it...it adds to the simplicity of the design and, I think, enhances it (and the total cost for a roll of it was $10). I use 28ct Monaco for my most difficult projects, but the small size of it is just overkill on these simple ones. I typically stay away from linen at all costs. Yes, it looks better when the project is finished, but linen is way more expensive and it's a counting nightmare (because I haven't figured out a way to grid it yet). The crookedness and unevenness of it drives me batty...give me a nice straight evenweave any day!
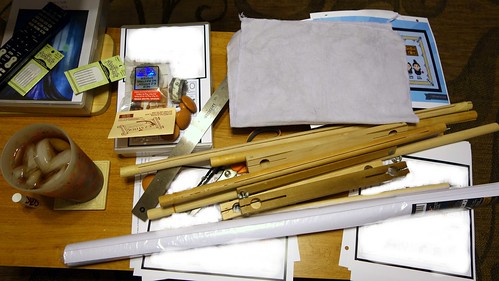
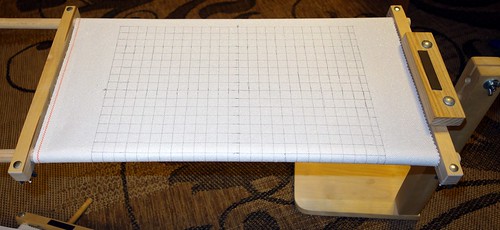
I also LOVE using scroll rods because I like how they keep the project taunt. With the help of a stand (either floor or lap), you are also able to stitch with two hands which really does cut your stitching time in half (even if it is a bit of a learning curve at first). If I'm using rings (or hoops), I tend to grip them too tightly and cause hand cramps (something I rarely notice until I literally have to pry my fingers off of it...I do that with video game controllers too). Plus, the extra material is so wadded up where it hangs loose, I can never iron it flat enough afterwards. I have several different scroll rods and stand systems, but luckily they are all interchangeable, so I don't have to worry about picking the right rods for the right stand. Depending on the rods, I may use basting strip tape or acid-free tape to affix the fabric to the rods (never trust the slots if your rods have them). Lately, I've been favoring the basting tape (seen in the upper middle left of the pic below).
As an aside, notice the large cup of tea there? For the first time ever, I tumped it over onto everything and had to subsequently wash material (especially the purple I used for the other Once project) and reprint patterns. Lucky me.
When I first unrolled the Aida, I noticed it was stretched crooked (which doesn't bode well for a cross stitch project, a real rarity in evenweaves like Aida), but I drew out the margins anyway. It was also extremely stiff, more so than normal, but I tried to make due. It was a new purchase (I thought I had some in stock, but I didn't have any white). Going to the store is hard enough for me as it is, but this project required numerous trips to Hobby Lobby in a week...enough that it might be a while until I'm able to go back again.
I always use pinking shears to cut around the edges because it makes the them fray less. Depending on the size of the chart, the original fabric size (and my mood), I may give anywhere from a 1 inch border to a 3 inch border around the edge for framing. Since I usually frame them myself (or, at the very least, mount them), I can easily work with 1" border...most framers would scoff at that.
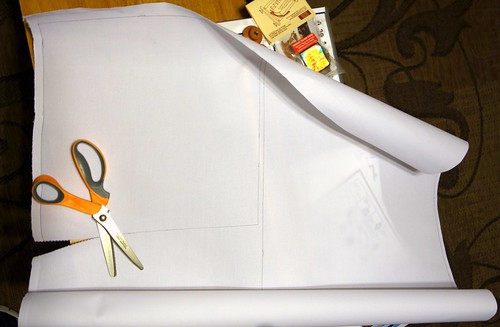
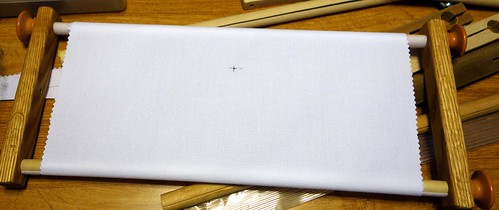
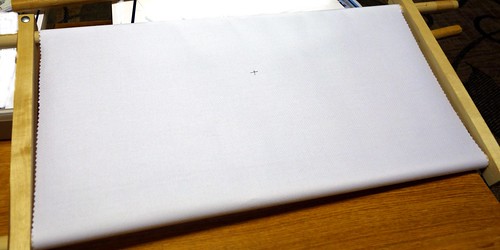
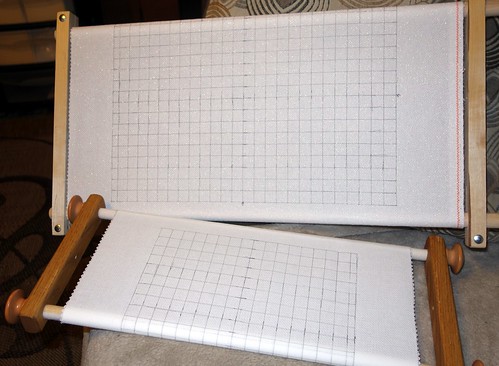
I use a pen to mark the edges for cut out as well as the grid lines, but more on grid lines and pens in a mo-mo. I also mark the center of the material so that once it's "scrolled up", I know where the center is:
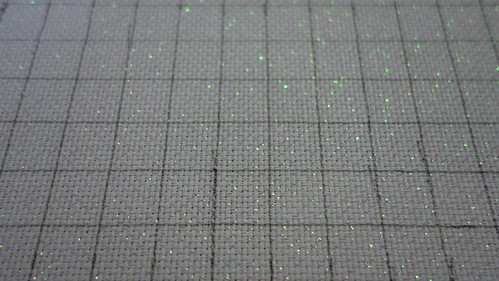
The more I debated the crooked, overly-stiff fabric, the more I hated it. So I went to one of my favorite online stores and bought two new pieces of fabric (I just couldn't handle yet another trip to Hobby Lobby and their cross stitch supply row is quite limited anyway), so tack another $20 on to the cost. I had to undo all the scrolling I had already done (wasting expensive basting tape, which meant another order from Amazon for $10), but I like the new stuff SO much better, so I didn't mind too much. Below is the new fabric all scrolled up. I went with a sparkling material for Once Upon A Time, but you can't really tell from this pic.
Maybe you can from this one, I think the sparkles add that little extra oomph:
Grid lines come next. I love Pilot FriXion pens the best. They iron off and have a much finer point that the washable ones. Some people complain that they can't get the grid lines to come off if they leave them on too long (for both the iron and the wash pens), but I've had projects gridded up for years without any removal issues
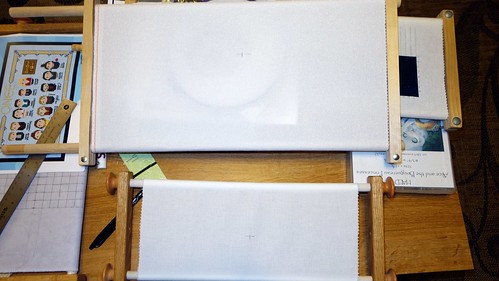
I didn't used to grid at all. I know it's called "counted cross stitch" and you really should be counting, but that's not so easy for an OCD-riddled person as I was often counting 5-10 times per instance. Most patterns use a 10x10 grid pattern, so if the pattern has 33 spaces, then I just count over three grid blocks plus three spaces instead of counting 33 spaces over numerous times. It also cuts down on counting mistakes that could potentially mean a lot of frogging (ripping out stitches) and re-stitching areas. The softer fabrics (like Monaco or Lugana) tend to not like frogging and it typically makes a mess out of the thread and your fabric. Some people also use fishing line to "stitch" their grid lines, but pens are so much easier and you don't have to worry about getting your stitched grid lines embedded in your stitching (easy to do in heavily confettied areas and messy backs, which I am the queen of). Here is both projects completely gridded (I typically only grid big projects a row at a time):
I do prefer a lap stand and really only use floor stands for vertical projects (because it's too hard to stitch lap-wise when the project is vertically challenged...verticals and my belly don't play well together). Depending on the size of the vertical, if I can fit it into a horizontal format, I will. Once is a vertical project, but it is small enough that I was able to still scroll it up horizontally. Luckily, V Mars is square. This is my absolute favorite lap stand (sadly, the manufacturer is no longer in business). But even the cheap-o ones you get at Hobby Lobby work better than my expensive American Dreams stand that I HAD to have a few years ago. It lives at work with my Rainy Wedding project (which I HAVE to re-scroll because the verticalness of it is KILLING me!).
There are other "utensils" involved in working a project. I use a magnifying light, but I tend to prefer to just use the light with reading glasses instead of the magnifying glass. I use twist-up colored crayons to mark the areas of the pattern I have finished (so that way I know where I'm at and what I have done). I also use several apps on my iPad that assist with stitching, specifically a PDF reader app and a time counter app. I've covered cross stitch apps before HERE, so no need to rehash.
And that's it for my prep work! It takes several days to several weeks to complete this first step (depending on the complexity of the project and the amount of material I need...sometimes I have to stretch it over a couple of paydays), but since most projects last upwards of one or two years, it's not such a big effort. I definitely feel for serial starters! If I was one, I'd be spending more time prepping than stitching!
Total prep cost of this project was around $80 (adding in my fabric snafu and extra basting tape). That's pretty cheap for two kits, so I think I did pretty good! I still may take another trek out to Hobby Lobby and get some beads because I HATE HATE HATE french knots and Once has a lot of them. Hopefully, I can keep that cost under $10.
The challenge starts in a couple of days, so I hope everyone is ready because I certainly am!
Comments
Great post, hope you have fun with your new projects :)